How to Take a Screenshot on a Mac
1. Take a Screenshot of Your Whole Screen
Step-1 : Press ⌘ + Shift + 3 at the same time

Step-2: Find the screenshot on your desktop. It will be saved as a .png file
 |
2. Take a Screenshot of Part of Your Screen
Step 1: Press ⌘ + Shift + 4 at the same time. You will see that your pointer changes to a cross-hair pointer.

Step 2Move the crosshair pointer to the initial point of your screenshot.

Step 3:Select an area by dragging the cross-hair pointer. While you are dragging, you can hold the Shift , Option or Space-bar to change the way the selection moves.
Step 4: Once you have selected the area, release your mouse or trackpad button. If you want to cancel the Mac OS X screenshot, just press esc key before you release the button.
Step 5: Find the screenshot on your desktop. It will be saved as a .png file
3. Take a Screenshot of a Window
- Press ⌘ , Shift and 3 at the same time. You will see that your pointer changes to a crosshair pointer.
- Press Spacebar. You will now see that the pointer changes from a cross-hair pointer to a camera pointer.
- Move your camera pointer to the window you want to screenshot on Mac.

5. Find the screenshot on your desktop. It will be saved as a .png file.
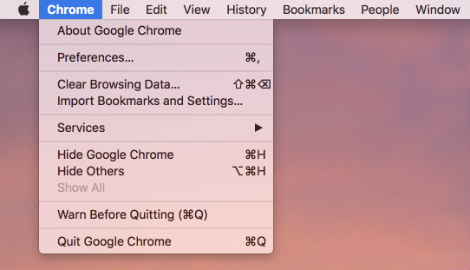
- Click the menu to show its contents.
- Press ⌘ + Shift + 3 at the same time. You will see that your pointer changes to a crosshair pointer.
- Press the Spacebar. You will now see that the pointer changes from a crosshair pointer to a camera pointer.
- Drag the camera pointer over the menu to highlight it.

5. Once you have selected the window, click your mouse or trackpad. If you want to cancel the screenshot, simply press esc key before you click.
6. Find the screenshot on your desktop. It will be saved as a .png file.
6. Find the screenshot on your desktop. It will be saved as a .png file.
- Click the menu to show its contents.
- Press ⌘ + Shift + 4 at the same time. You will see that your pointer changes to a crosshair pointer.
- Drag the crosshair pointer to select the menu.
- Once you have selected the window, click your mouse or trackpad. If you want to cancel the screenshot, simply press esc key before you click.
- Find the screenshot on your desktop. It will be saved as a .png file.
Step 1. Open the screen you wish to take a screenshot.
Step 2. Press “Shift” + “Command” + number “3” keys altogether.

Step 3. The screenshot will get copied to the Mac clipboard, if you wish to save the screenshot in a PNG file then press “Shift” + “3” keys together while capturing.

✰ Some Extra Points on How to Do a Screenshot on a Mac
- These processes are valid for all of Apple operating system versions namely, Leopard, Snow Leopard, Lion, Mountain Lion, Mavericks, Yosemite, El Capitan and macOS High Sierra.
- Some applications may not let you take screenshots of their windows.
- You can open your screenshots with Preview or any image-viewing application.
- If you want to save your screenshot to the clipboard, instead of a file on your desktop, simply use the Shift + Command + Control + 3 combination.
- On versions 10.6 and later, screenshots will be saved as “Screenshot name date at time.png”.


screenshot on mac
ReplyDeleteHow to take a screenshot on Mac, MacBook Pro? Check 3 keyboard shortcuts, which window you want to capture or with a specific portion of your Mac Apple screen.
See More:-https://trainingsadda.blogspot.com/2021/01/screenshot-on-mac.html